


ElasticSearch 8.10.2版本集群部署初体验
1 搭建集群的环境配置
ElasticSearch 8版本以上都自带JDK
OS:CentOS Linux release 7.9.2009 (Core)
ElasticSearch:8.10.2
JDK:openjdk version "20.0.2" 2023-07-18
节点资源配置:
服务器IP 服务器名 ES节点名称 节点角色 节点配置 10.10.0.106 kafka01 node-01 [ master, data ] CPU:4 memory:10G 10.10.0.107 kafka02 node-02 [ master, data ] CPU:4 memory:8G 10.10.0.108 kafka03 node-03 [ master, data ] CPU:4 memory:8G
2 ElasticSearch 集群建立前提
ElasticSearch集群必须至少有两个具有选举为master资格的节点,集群才能启动,所以正式使用的集群具有选举为master资格的节点必须三个或更多,否则主节点出现故障时集群无法完成切换主节点,导致集群停止运行。
3 ElasticSearch软件下载
下载地址:https://www.elastic.co/cn/downloads/elasticsearch
# 使用wget命令下载elasticsearch
wget -P /opt https://artifacts.elastic.co/downloads/elasticsearch/elasticsearch-8.10.2-linux-x86_64.tar.gz
4 ElasticSearch集群部署
4.1 创建elastic用户
# 创建elastic用户组
groupadd -g 666 elastic

# 创建elastic用户
useradd -u 666 -g elastic -d /home/elastic -c "elastic user" -s /bin/bash elastic
4.2 解压ElasticSearch压缩包
# 解压ElasticSearch压缩包到/opt目录
tar -zxvf elasticsearch-8.10.2-linux-x86_64.tar.gz -C /opt
]$ ll /opt
drwxr-xr-x  9 root root       155 Sep 19 16:22 elasticsearch-8.10.2
4.3 重命名为elasticsearch-8.10
# 重命名elasticsearch-8.10.2目录
]$ mv elasticsearch-8.10.2 elasticsearch-8.10
4.4 Linux 系统调优
4.4.1 ulimit系统参数
需要重启Linux服务,使ulimit系统参数生效。
sudo tee /etc/security/limits.d/21-elastic.conf <<-'EOF'
*                soft    nofile         1048576
*                hard    nofile         1048576
*                soft    memlock        unlimited
*                hard    memlock        unlimited
root             soft    nofile         1048576
root             hard    nofile         1048576
root             soft    memlock        unlimited
root             hard    memlock        unlimited
EOF
4.4.2 内核调优配置
cat << SETTINGS | sudo tee /etc/sysctl.d/70-infini.conf
fs.file-max = 10485760
fs.nr_open = 10485760
vm.max_map_count = 262145

net.core.somaxconn = 65535
net.core.netdev_max_backlog = 65535
net.core.rmem_default = 262144
net.core.wmem_default = 262144
net.core.rmem_max = 4194304
net.core.wmem_max = 4194304

net.ipv4.ip_forward = 1
net.ipv4.ip_nonlocal_bind = 1
net.ipv4.ip_local_port_range = 1024 65535
net.ipv4.conf.default.accept_redirects = 0
net.ipv4.conf.default.rp_filter = 1
net.ipv4.conf.all.accept_redirects = 0
net.ipv4.conf.all.send_redirects = 0
net.ipv4.tcp_tw_reuse = 1
net.ipv4.tcp_tw_recycle = 1
net.ipv4.tcp_max_tw_buckets = 300000
net.ipv4.tcp_timestamps = 1
net.ipv4.tcp_syncookies = 1
net.ipv4.tcp_max_syn_backlog = 65535
net.ipv4.tcp_synack_retries = 0
net.ipv4.tcp_keepalive_intvl = 30
net.ipv4.tcp_keepalive_time = 900
net.ipv4.tcp_keepalive_probes = 3
net.ipv4.tcp_fin_timeout = 10
net.ipv4.tcp_max_orphans = 131072
net.ipv4.tcp_rmem = 4096 4096 16777216
net.ipv4.tcp_wmem = 4096 4096 16777216
net.ipv4.tcp_mem = 786432 3145728 4194304
SETTINGS
执行下面的命令验证配置参数是否合法。
sysctl -p /etc/sysctl.d/70-infini.conf
重启系统查看ulimit配置是否生效
rebootulimit检查
[root@kafka01 ~]# ulimit -a
core file size          (blocks, -c) 0
data seg size           (kbytes, -d) unlimited
scheduling priority             (-e) 0
file size               (blocks, -f) unlimited
pending signals                 (-i) 14990
max locked memory       (kbytes, -l) unlimited
max memory size         (kbytes, -m) unlimited
open files                      (-n) 1048576
pipe size            (512 bytes, -p) 8
POSIX message queues     (bytes, -q) 819200
real-time priority              (-r) 0
stack size              (kbytes, -s) 8192
cpu time               (seconds, -t) unlimited
max user processes              (-u) 16000
virtual memory          (kbytes, -v) unlimited
file locks                      (-x) unlimited
4.5 编辑ElasticSearch配置文件
4.5.1 编辑config/jvm.options
# 备份jvm.options配置文件
cp /opt/elasticsearch-8.10/config/jvm.options /opt/elasticsearch-8.10/config/jvm.options.bak
# 编辑jvm.options配置文件
vi /opt/elasticsearch-8.10/config/jvm.options
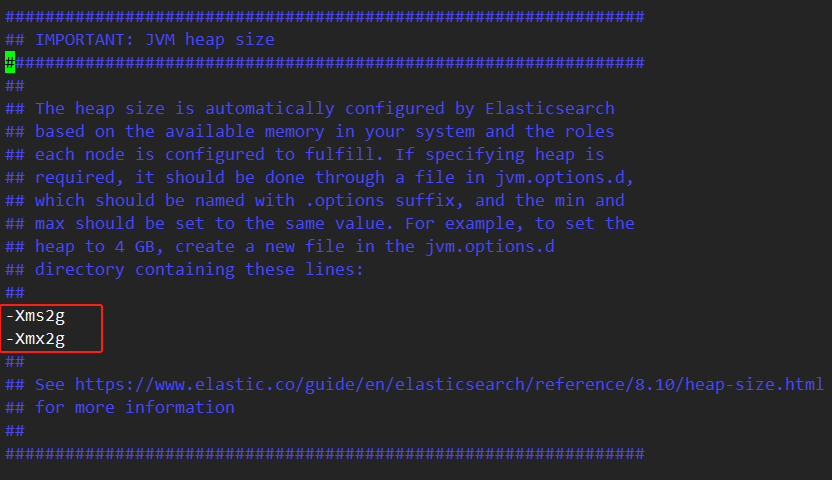
# 去掉下面这两行的注释,并且根据自己的机器配置更改jvm内存大小,本次设置内存为2g
-Xms2g
-Xmx2g
4.5.2 编辑config/elasticsearch.yml
]$ vi /opt/elasticsearch-8.10/config/elasticsearch.yml
# ======================== Elasticsearch Configuration =========================
#
# NOTE: Elasticsearch comes with reasonable defaults for most settings.
#       Before you set out to tweak and tune the configuration, make sure you
#       understand what are you trying to accomplish and the consequences.
#
# The primary way of configuring a node is via this file. This template lists
# the most important settings you may want to configure for a production cluster.
#
# Please consult the documentation for further information on configuration options:
# https://www.elastic.co/guide/en/elasticsearch/reference/index.html
#
# ---------------------------------- Cluster -----------------------------------
#
# Use a descriptive name for your cluster:
#
cluster.name: es-cluster
#
# ------------------------------------ Node ------------------------------------
#
# Use a descriptive name for the node:
#
node.name: node-01
#
node.roles: [ master, data ]
# Add custom attributes to the node:
#
#node.attr.rack: r1
#
# ----------------------------------- Paths ------------------------------------
#
# Path to directory where to store the data (separate multiple locations by comma):
#
path.data: /opt/elasticsearch-8.10/data
#
# Path to log files:
#
path.logs: /opt/elasticsearch-8.10/logs
#
# ----------------------------------- Memory -----------------------------------
#
# Lock the memory on startup:
#
#bootstrap.memory_lock: true
#
# Make sure that the heap size is set to about half the memory available
# on the system and that the owner of the process is allowed to use this
# limit.
#
# Elasticsearch performs poorly when the system is swapping the memory.
#
# ---------------------------------- Network -----------------------------------
#
# By default Elasticsearch is only accessible on localhost. Set a different
# address here to expose this node on the network:
#
# 允许连接IP
network.host: 0.0.0.0
#
# By default Elasticsearch listens for HTTP traffic on the first free port it
# finds starting at 9200. Set a specific HTTP port here:
#
# 网页访问端口,自定义设置为9201
http.port: 9201
#
http.cors.enabled: true
#
http.cors.allow-origin: "*"
#
# 集群内部通信端口,自定义为设置9301
transport.port: 9301
# For more information, consult the network module documentation.
#
# xpack
xpack.security.enabled: true
xpack.security.transport.ssl.enabled: true
xpack.security.transport.ssl.verification_mode: none
xpack.security.transport.ssl.keystore.path: /opt/elasticsearch-8.10/config/certs/elastic-certificates.p12
xpack.security.transport.ssl.truststore.path: /opt/elasticsearch-8.10/config/certselastic-certificates.p12
ingest.geoip.downloader.enabled: false
#
# --------------------------------- Discovery ----------------------------------
#
# Pass an initial list of hosts to perform discovery when this node is started:
# The default list of hosts is ["127.0.0.1", "[::1]"]
#
discovery.seed_hosts: ["10.10.0.106:9301", "10.10.0.107:9301", "10.10.0.108:9301"]
#
# Bootstrap the cluster using an initial set of master-eligible nodes:
#
cluster.initial_master_nodes: ["node-01", "node-02", "node-03"]
#
# For more information, consult the discovery and cluster formation module documentation.
#
# ---------------------------------- Various -----------------------------------
#
# Allow wildcard deletion of indices:
#
#action.destructive_requires_name: false
更改以下内容:
< 注:elasticsearch 8版本的参数发生改变,role.data:true不再使用,改为node.roles: [data] ># 集群名称 cluster.name: es-cluster # 节点名称 node.name: node-1 # 注意至少有两个具有选举master资格的节点 node.roles: [master,data] # 数据存储位置 path.data: /opt/elasticsearch-8.10/data # 日志存储位置 path.logs: /opt/elasticsearch-8.10/logs # 允许连接IP network.host: 0.0.0.0 # 自定义网页访问端口,默认端口为9200 http.port: 9200 # 启用网页跨域访问 http.cors.enabled: true http.cors.allow-origin: "*" # 集群内部通信端口,默认端口为9300 transport.port: 9300 # elasticsearch Master 选举成员 cluster.initial_master_nodes: ["node-1", "node-2", "node-3"] action.destructive_requires_name: false # 集群成员 discovery.seed_hosts: ["10.1.80.94:9300", "10.1.80.95:9300","10.1.80.96:9300"]
4.6 配置集群间安全访问证书密钥
仅在集群的第一台服务器node-01上执行执行
# 签发ca证书
]$ /opt//opt/elasticsearch-8.10/bin/elasticsearch-certutil ca
`【ENTER】`   什么也不用输入直接回车
`【ENTER】`   什么也不用输入直接回车

# 用ca证书签发节点证书
]$ /opt/elasticsearch-8.10/bin/elasticsearch-certutil cert --ca elastic-stack-ca.p12
`【ENTER】`   什么也不用输入直接回车
`【ENTER】`   什么也不用输入直接回车
`【ENTER】`   什么也不用输入直接回车

# 创建/opt/elasticsearch-8.10/config/certs目录
]$ mkdir -P /opt/elasticsearch-8.10/config/certs

# 将证书移动到/opt/elasticsearch-8.10/config/certs目录
]$ mv /opt/elasticsearch-8.10/config/elastic*.p12 /opt/elasticsearch-8.10/config/certs
4.7 编辑config/elasticsearch.yml添加证书密钥
将证书从
/opt/elasticsearch-8.10/config目录移动到/opt/elasticsearch-8.10/config/certs目录后修改config/elasticsearch.yml配置文件
]$ vi /opt/elasticsearch-8.10/config/elasticsearch.yml
# 添加以下参数:
xpack.security.enabled: true
xpack.security.transport.ssl.enabled: true
xpack.security.transport.ssl.verification_mode: none
xpack.security.transport.ssl.keystore.path: /opt/elasticsearch-8.10/config/certs/elastic-certificates.p12
xpack.security.transport.ssl.truststore.path: /opt/elasticsearch-8.10/config/certs/elastic-certificates.p12
ingest.geoip.downloader.enabled: false

4.8 创建剩余集群节点
将node-01节点上的
/opt/elasticsearch-8.10目录scp到其余两台节点上。复制完成后需要修改config/elasticsearch.yml配置文件。修改集群节点名称:node-01、node-02、node-03
修改节点角色(按需求更改):
node.roles: [master,data]
node.roles: [master,data]
node.roles: [master,data]
]$ scp -r /opt/elasticsearch-8.10 root@kafka02:/opt
]$ scp -r /opt/elasticsearch-8.10 root@kafka03:/opt
4.9 修改elasticsearch-8.10目录属组权限
# 修改/opt/elasticsearch-8.10属组权限
chown -R elastic:elastic /opt/elasticsearch-8.10/
5 ElasticSearch集群节点启动停止
5.1 启动ElasticSearch集群节点
ElasticSearch服务不能使用root用户启动,必须切换到elastic用户再启动ElasticSearch服务。
分别在3台机器上启动
# 切换到elastic用户
]$ su elastic

# 进入到/opt/elasticsearch-8.10目录
]$ cd /opt/elasticsearch-8.10

# 前台启动elasticsearch服务,可以使用Ctrl + Z中断进程
]$ bin/elasticsearch
# elasticsearch服务启动后输出账号信息和token
━━━━━━━━━━━━━━━━━━━━━━━━━━━━━━━━━━━━━━━━━━━━━━━━━━━━━━━━━━━━━━━━━━━━━━━━━━━━━━━━━━━━━━━━━━━━━━━━━━━━━━━━━━━━━━━━━━━━━━━━━━━━━━━━━━━━━━━━━━━━━
✅ Elasticsearch security features have been automatically configured!
✅ Authentication is enabled and cluster connections are encrypted.

ℹ️  Password for the elastic user (reset with `bin/elasticsearch-reset-password -u elastic`):
 qWftAXx1HeHtIE=d5We2

ℹ️  HTTP CA certificate SHA-256 fingerprint:
 f1b884c1e1f04f34c9590a2934a33cb47053ef778ca370e003e3dab2ee3dd8ac

ℹ️  Configure Kibana to use this cluster:
• Run Kibana and click the configuration link in the terminal when Kibana starts.
• Copy the following enrollment token and paste it into Kibana in your browser (valid for the next 30 minutes):
 eyJ2ZXIiOiI4LjEwLjIiLCJhZHIiOlsiMTAuMTAuMC4xMDA6OTIwMCJdLCJmZ3IiOiJmMWI4ODRjMWUxZjA0ZjM0Yzk1OTBhMjkzNGEzM2NiNDcwNTNlZjc3OGNhMzcwZTAwM2UzZGFiMmVlM2RkOGFjIiwia2V5IjoibXZod3pZb0JQUmVQV21aMFFEMWg6dHNpM3RfcHRSWmlJT3JvT2RXZktNUSJ9

ℹ️  Configure other nodes to join this cluster:
• On this node:
 ⁃ Create an enrollment token with `bin/elasticsearch-create-enrollment-token -s node`.
 ⁃ Uncomment the transport.host setting at the end of config/elasticsearch.yml.
 ⁃ Restart Elasticsearch.
• On other nodes:
 ⁃ Start Elasticsearch with `bin/elasticsearch --enrollment-token <token>`, using the enrollment token that you generated.
━━━━━━━━━━━━━━━━━━━━━━━━━━━━━━━━━━━━━━━━━━━━━━━━━━━━━━━━━━━━━━━━━━━━━━━━━━━━━━━━━━━━━━━━━━━━━━━━━━━━━━━━━━━━━━━━━━━━━━━━━━━━━━━━━━━━━━━━━━━━━
5.2 修改elastic密码
如果集群搭建成功只需要在一个节点上更改即可。
-i:设置自定义密码
]$ bin/elasticsearch-reset-password -u elastic -i
This tool will reset the password of the [elastic] user.
You will be prompted to enter the password.
Please confirm that you would like to continue [y/N]y


Enter password for [elastic]:
Re-enter password for [elastic]:
Password for the [elastic] user successfully reset.
bin/elasticsearch-reset-password -u elasti:为elasti用户生成随机密码]$ bin/elasticsearch-reset-password -u elasti This tool will reset the password of the [elastic] user to an autogenerated value. The password will be printed in the console. Please confirm that you would like to continue [y/N]y Password for the [elastic] user successfully reset. New value: gvrAgckR9fmxqDjgX*Iy
5.3 停止elasticsearch服务
bin/elasticsearch:前台启动的
elasticsearch服务可以使用Ctrl + Z停止服务[2023-09-26T01:48:40,970][INFO ][o.e.x.s.a.f.FileUserPasswdStore] [other-server] users file [/opt/elasticsearch-8.10/config/users] changed. updating users... [2023-09-26T01:48:40,972][INFO ][o.e.x.s.a.f.FileUserRolesStore] [other-server] users roles file [/opt/elasticsearch-8.10/config/users_roles] changed. updating users roles... ^Z [1]+ Stopped bin/elasticsearch
bin/elasticsearch -d:后台启动的
elasticsearch服务,需要使用kill -9停止服务]$ ps -ef|grep elasticsearch|grep -v "grep"|awk -F" " '{ print $2 }' |xarg -i kill -9 {}
6 ElasticSearch集群相关命令
6.1 查看集群状态
]$ curl -k --user elastic:admin@123 -XGET  http://10.10.0.106:9201/_cat/nodes?v
ip          heap.percent ram.percent cpu load_1m load_5m load_15m node.role master name
10.10.0.107           34          77   0    0.03    0.09     0.13 dm        *      node-02
10.10.0.106            8          90   0    0.06    0.07     0.08 dm        -      node-01
10.10.0.108           48          80   0    0.12    0.16     0.16 dm        -      node-03
master列中的 * 表示为主节点
6.2 列出所有索引
# 列出所有索引
]$ curl -k --user elastic:admin@123 -XGET  http://10.10.0.106:9201/_cat/indices?v
health status index                            uuid                   pri rep docs.count docs.deleted store.size pri.store.size
green  open   .infini_index                    DsgysdAhQkWFh2mGuuTrjg   1   1          0            0       496b           248b
green  open   .infini_rbac-role                yFpRSjMdSvCmV2DNfDfsLQ   1   1          0            0       496b           248b
green  open   .infini_flow                     mkxo8c22QCmq5lkIptrzLw   1   1          0            0       496b           248b
green  open   .infini_agent-setting            L3vfs9-pRTGO4EytGOSjPA   1   1          0            0       496b           248b
green  open   .infini_notification             fXgzijXNTNeV9C0xFTud6Q   1   1          0            0       496b           248b
green  open   .infini_alert-history-00001      A_a1r7tUTMSEk1qZzS1_hg   1   1       1908            0      4.8mb          2.2mb
green  open   .infini_layout                   LFdNGL9KTei79ELFUNsFFw   1   1          6            0     99.5kb         49.7kb
green  open   .infini_agent                    rYV77XEWRMCJgZ28BndAag   1   1          0            0       496b           248b
green  open   .infini_host                     RE6O9AUPSkW14UVDl4laRg   1   1          0            0       496b           248b
green  open   .infini_channel                  L2rmNSaeSQi6BNna8jUXvA   1   1         12            0     59.1kb         29.5kb
green  open   .infini_view                     KpveoSIlQOiQaTX8-AoPCA   1   1          1            0     39.2kb         19.6kb
green  open   .infini_cluster                  H9blKu6xS_mJR7k-CPThAQ   1   1          2            0     77.9kb         38.9kb
green  open   .infini_credential               mdWpiBn7Q6C_Ygg33cDLeA   1   1          2            0     28.7kb         14.3kb
green  open   .infini_entry                    -d2FhGB5R5e5qWHuyNpjAg   1   1          0            0       496b           248b
green  open   .infini_instance                 26UNDHReTCiWd9kd09QDGQ   1   1          0            0       496b           248b
green  open   .infini_email-server             gC2aArmzSjquVDDwsz1HYg   1   1          0            0       496b           248b
green  open   .infini_logs-00001               qtemoj7gT8mxG5smEhWbvg   1   1          0            0       496b           248b
green  open   .infini_activities-00001         IVyv7IVrSxGaWte_uZ7D0A   1   1         10            0    199.2kb         99.6kb
green  open   .infini_async_bulk_results-00001 rBb9o5j-T96nauWTc8FL-g   1   1          0            0       496b           248b
green  open   .infini_metrics-00001            brjM66k5TxG2a1pyzXfJfw   1   1          0            0       496b           248b
green  open   .infini_alert-rule               KT0qvEuJS12oxHA4F0VaEQ   1   1          9            0    136.3kb         84.3kb
green  open   .infini_rbac-user                xq6xQaO7T4SnbK418HoJBQ   1   1          1            0     17.2kb          8.6kb
green  open   .infini_requests_logging-00001   fIjXHsqKQZ-e9Tl8HlydpQ   1   1          0            0       496b           248b
green  open   .infini_router                   vJmjqkFlT8-Dw9m6g3hoFg   1   1          0            0       496b           248b
green  open   .infini_agent-node               CPJP7Bf4TyCp2JT-ZgCwEA   1   1          0            0       496b           248b
green  open   .infini_visualization            W23ch_uVSnCkUGj7fEonWg   1   1          0            0       496b           248b
green  open   .infini_commands                 GVXDtUtvTluy638nKmNS7Q   1   1          0            0       496b           248b
green  open   .infini_task                     Ds0D3heBSeet_qji3Z1L3Q   1   1          0            0       496b           248b
green  open   .infini_widget                   aEbh3NE8QgGUR1NqtQollA   1   1          8            0     58.4kb         29.2kb
green  open   .infini_node                     TaFVUb5rQQGaUsoxPFlB2A   1   1          5            1    175.1kb         86.9kb
green  open   .infini_alert-message            53P1bRafQ5e4qeCN0XOKmg   1   1          0            0       496b           248b
green  open   .infini_dashboard                Yott5pYoQIy73d3ROkY3zQ   1   1          0            0       496b           248b
6.3 创建并查看索引
# 创建customertxt索引
]$ curl -k --user elastic:admin@123 -X PUT '10.10.0.106:9201/customertxt?pretty'
{
  "acknowledged" : true,
  "shards_acknowledged" : true,
  "index" : "customertxt"
}

# 列出所有索引
]$ curl -k --user elastic:admin@123 -XGET "http://10.10.0.106:9201/_cat/indices?v"
health status index                            uuid                   pri rep docs.count docs.deleted store.size pri.store.size
green  open   .infini_instance                 26UNDHReTCiWd9kd09QDGQ   1   1          0            0       496b           248b
green  open   .infini_channel                  L2rmNSaeSQi6BNna8jUXvA   1   1         12            0     59.1kb         29.5kb
green  open   .infini_rbac-role                yFpRSjMdSvCmV2DNfDfsLQ   1   1          0            0       496b           248b
green  open   .infini_index                    DsgysdAhQkWFh2mGuuTrjg   1   1          0            0       496b           248b
green  open   .infini_agent-setting            L3vfs9-pRTGO4EytGOSjPA   1   1          0            0       496b           248b
green  open   .infini_email-server             gC2aArmzSjquVDDwsz1HYg   1   1          0            0       496b           248b
green  open   .infini_view                     KpveoSIlQOiQaTX8-AoPCA   1   1          1            0     39.2kb         19.6kb
green  open   .infini_commands                 GVXDtUtvTluy638nKmNS7Q   1   1          0            0       496b           248b
green  open   .infini_alert-message            53P1bRafQ5e4qeCN0XOKmg   1   1          0            0       496b           248b
green  open   .infini_router                   vJmjqkFlT8-Dw9m6g3hoFg   1   1          0            0       496b           248b
green  open   .infini_widget                   aEbh3NE8QgGUR1NqtQollA   1   1          8            0     58.4kb         29.2kb
green  open   .infini_alert-rule               KT0qvEuJS12oxHA4F0VaEQ   1   1          9            0    136.3kb         84.3kb
green  open   .infini_credential               mdWpiBn7Q6C_Ygg33cDLeA   1   1          2            0     28.7kb         14.3kb
green  open   .infini_metrics-00001            brjM66k5TxG2a1pyzXfJfw   1   1          0            0       496b           248b
green  open   .infini_host                     RE6O9AUPSkW14UVDl4laRg   1   1          0            0       496b           248b
green  open   .infini_layout                   LFdNGL9KTei79ELFUNsFFw   1   1          6            0     99.5kb         49.7kb
green  open   .infini_node                     TaFVUb5rQQGaUsoxPFlB2A   1   1          5            1    175.1kb         86.9kb
green  open   .infini_dashboard                Yott5pYoQIy73d3ROkY3zQ   1   1          0            0       496b           248b
green  open   .infini_alert-history-00001      A_a1r7tUTMSEk1qZzS1_hg   1   1       1953            0      5.3mb          2.2mb
green  open   .infini_agent-node               CPJP7Bf4TyCp2JT-ZgCwEA   1   1          0            0       496b           248b
green  open   .infini_visualization            W23ch_uVSnCkUGj7fEonWg   1   1          0            0       496b           248b
green  open   .infini_requests_logging-00001   fIjXHsqKQZ-e9Tl8HlydpQ   1   1          0            0       496b           248b
green  open   .infini_activities-00001         IVyv7IVrSxGaWte_uZ7D0A   1   1         10            0    199.2kb         99.6kb
green  open   .infini_rbac-user                xq6xQaO7T4SnbK418HoJBQ   1   1          1            0     17.2kb          8.6kb
green  open   .infini_cluster                  H9blKu6xS_mJR7k-CPThAQ   1   1          2            0     77.9kb         38.9kb
green  open   .infini_flow                     mkxo8c22QCmq5lkIptrzLw   1   1          0            0       496b           248b
green  open   customertxt                      SFRMTwr4Tfukxlt_TY41pg   1   1          0            0       452b           226b
green  open   .infini_logs-00001               qtemoj7gT8mxG5smEhWbvg   1   1          0            0       496b           248b
green  open   .infini_notification             fXgzijXNTNeV9C0xFTud6Q   1   1          0            0       496b           248b
green  open   .infini_async_bulk_results-00001 rBb9o5j-T96nauWTc8FL-g   1   1          0            0       496b           248b
green  open   .infini_agent                    rYV77XEWRMCJgZ28BndAag   1   1          0            0       496b           248b
green  open   .infini_entry                    -d2FhGB5R5e5qWHuyNpjAg   1   1          0            0       496b           248b
green  open   .infini_task                     Ds0D3heBSeet_qji3Z1L3Q   1   1          0            0       496b           248b
6.4 检查节点访问是否正常
]$ curl -k --user elastic:admin@123 -XGET "http://10.10.0.106:9201/"
{
  "name" : "node-01",
  "cluster_name" : "es-cluster",
  "cluster_uuid" : "BP9nJIEpR_ODd1tNiaqQMQ",
  "version" : {
    "number" : "8.10.2",
    "build_flavor" : "default",
    "build_type" : "tar",
    "build_hash" : "6d20dd8ce62365be9b1aca96427de4622e970e9e",
    "build_date" : "2023-09-19T08:16:24.564900370Z",
    "build_snapshot" : false,
    "lucene_version" : "9.7.0",
    "minimum_wire_compatibility_version" : "7.17.0",
    "minimum_index_compatibility_version" : "7.0.0"
  },
  "tagline" : "You Know, for Search"
}
7 补充点
7.1 使用systemctl管理ElasticSearch服务
创建/etc/systemd/system/elasticsearch.service配置文件
]$ vim /etc/systemd/system/elasticsearch.service
]$ cat /etc/systemd/system/elasticsearch.service
[Unit]
Description=elasticsearch
After=network.target

[Service]
Type=forking
# elasticsearch服务启动用户
User=elastic

# elasticsearch服务启动命令
ExecStart=/opt/elasticsearch-8.10/bin/elasticsearch -d -p /opt/elasticsearch-8.10/logs/elasticsearch.pid

# elasticsearch服务使用Linux资源设置
PrivateTmp=true
LimitNOFILE=65536
LimitNPROC=65536
LimitAS=infinity
LimitFSIZE=infinity
LimitMEMLOCK=infinity

TimeoutStopSec=0
KillSignal=SIGTERM
KillMode=process
SendSIGKILL=no
SuccessExitStatus=143

[Install]
WantedBy=multi-user.target
systemctl 相关命令
# 重新加载服务配置文件
systemctl daemon-reload

# 启动elasticsearch服务
systemctl start elasticsearch

# 停止elasticsearch服务
systemctl stop elasticsearch

# 检查elasticsearch服务状态
systemctl status elasticsearch

# 设置elasticsearch开机自启动
systemctl enable elasticsearch
-d2979772834f4346a961b123d2a49447.jpg)


评论区