


Linux CentOS安装MongoDB数据库
1 下载MongoDB安装包
下载地址:https://www.mongodb.com/try/download/community
本文档安装版本为:4.4.13

复制Link使用wget下载安装包
下载地址:https://fastdl.mongodb.org/linux/mongodb-linux-x86_64-rhel70-4.4.13.tgz
[root@other-server opt]# wget https://fastdl.mongodb.org/linux/mongodb-linux-x86_64-rhel70-6.0.2.tgz
--2022-10-22 00:06:02--  https://fastdl.mongodb.org/linux/mongodb-linux-x86_64-rhel70-6.0.2.tgz
Resolving fastdl.mongodb.org (fastdl.mongodb.org)... 13.224.250.14, 13.224.250.31, 13.224.250.19, ...
Connecting to fastdl.mongodb.org (fastdl.mongodb.org)|13.224.250.14|:443... connected.
HTTP request sent, awaiting response... 200 OK
Length: 71731747 (68M) [application/gzip]
Saving to: ‘mongodb-linux-x86_64-rhel70-6.0.2.tgz’

100%[====================================================================================================================] 71,731,747  9.98MB/s   in 7.9s

2022-10-22 00:06:12 (8.61 MB/s) - ‘mongodb-linux-x86_64-rhel70-6.0.2.tgz’ saved [71731747/71731747]

[root@other-server opt]# pwd
/opt
[root@other-server opt]# ll
total 70052
-rw-r--r--. 1 root root 71731747 Sep 28 23:09 mongodb-linux-x86_64-rhel70-6.0.2.tgz
[root@other-server opt]#
2 开始安装MongoDB数据库
2.1 创建MongoDB数据库相关文件夹
# 安装目录
mkdir -p /usr/local/mongodb
# 配置文件目录
mkdir -p /usr/local/mongodb/conf
# 数据保存目录
mkdir -p /data/mongodb/db
# 日志保存目录
mkdir -p /data/mongodb/logs
2.2 解压MongoDB安装包
[root@otherserver opt]# tar -zxvf mongodb-linux-x86_64-rhel70-4.4.13.tgz
mongodb-linux-x86_64-rhel70-4.4.13/LICENSE-Community.txt
mongodb-linux-x86_64-rhel70-4.4.13/MPL-2
mongodb-linux-x86_64-rhel70-4.4.13/README
mongodb-linux-x86_64-rhel70-4.4.13/THIRD-PARTY-NOTICES
mongodb-linux-x86_64-rhel70-4.4.13/bin/install_compass
mongodb-linux-x86_64-rhel70-4.4.13/bin/mongo
mongodb-linux-x86_64-rhel70-4.4.13/bin/mongod
mongodb-linux-x86_64-rhel70-4.4.13/bin/mongos
2.3 复制mongodb执行文件
cp -r mongodb-linux-x86_64-rhel70-4.4.13/* /usr/local/mongodb/
2.4 创建mongodb.conf配置文件
[root@otherserver opt]# cat /usr/local/mongodb/conf/mongodb.conf
# 端口号
port=27017
# 开启用户认证
auth=true
# 远程访问
bind_ip=0.0.0.0
# 以追加的方式记录日志
logappend=true
# 以守护进程的方式运行
fork=true
# MongoDB数据保存目录
dbpath=/data/mongodb/db
# MongoDB日志保存目录
logpath=/data/mongodb/logs/mongodb.log
# MongoDB pid保存目录
pidfilepath=/data/mongodb/logs/mongodb.pid
2.5 测试启动mongodb服务
[root@otherserver opt]# /usr/local/mongodb/bin/mongod --config /usr/local/mongodb/conf/mongodb.conf
about to fork child process, waiting until server is ready for connections.
forked process: 93521
child process started successfully, parent exiting
[root@otherserver opt]#
启动成功!
2.6 配置环境变量
修改/etc/profile添加一下配置,配置mongodb环境变量
export MONGODB_HOME="/usr/local/mongodb"
export PATH=$PATH:$MONGODB_HOME/bin
刷新配置文件
[root@other-server conf]# source /etc/profile
查看MongoDB版本
[root@other-server conf]# mongod -version
db version v4.4.13
Build Info: {
    "version": "4.4.13",
    "gitVersion": "94fb7dfc8b974f1f5343e7ea394d0d9deedba50e",
    "openSSLVersion": "OpenSSL 1.0.1e-fips 11 Feb 2013",
    "modules": [],
    "allocator": "tcmalloc",
    "environment": {
        "distmod": "rhel70",
        "distarch": "x86_64",
        "target_arch": "x86_64"
    }
}
3 给MongoDB数据库设置开机启动
3.1 创建mongodb.service服务文件
[root@otherserver opt]# cat /etc/systemd/system/mongodb.service
[Unit]
Description=mongodb
After=network.target remote-fs.target nss-lookup.target

[Service]
Type=forking
RuntimeDirectory=mongodb
RuntimeDirectoryMode=0751
PIDFile=/data/mongodb/logs/mongodb.pid
ExecStart=/usr/local/mongodb/bin/mongod --config /usr/local/mongodb/conf/mongodb.conf
ExecStop=/usr/local/mongodb/bin/mongod --shutdown --config /usr/local/mongodb/conf/mongodb.conf
PrivateTmp=false

[Install]
WantedBy=multi-user.target
3.2 设置开机启动并启动服务
[root@otherserver opt]# systemctl enable mongodb  //设置开机启动
Created symlink from /etc/systemd/system/multi-user.target.wants/mongodb.service to /etc/systemd/system/mongodb.service.
[root@otherserver opt]# systemctl start mongodb  //启动服务
4 创建MongoDB用户
4.1 修改mongodb.conf配置文件
修改MongoDB.conf 配置文件将auth=true注释,然后重启MongoDB服务。
[root@otherserver conf]# vim /usr/lcoal/mongodb/conf/mongodb.conf
[root@otherserver conf]# cat mongodb.conf
# 端口号
port=27017
# 开启用户认证
# auth=true
# 远程访问
bind_ip=0.0.0.0
# 以追加的方式记录日志
logappend=true
# 以守护进程的方式运行
fork=true
# MongoDB数据保存目录
dbpath=/data/mongodb/db
# MongoDB日志保存目录
logpath=/data/mongodb/logs/mongodb.log
# MongoDB pid保存目录
pidfilepath=/data/mongodb/logs/mongodb.pid
[root@otherserver conf]#
4.2 重启mongodb服务使配置生效
[root@otherserver conf]# systemctl restart mongodb
4.3 下载MongoDB Shell(可选)
4.3.1 下载MongoDB Shell
备注:6.0.2没有mongo命令,需要安装MongoDB Shell(可选)
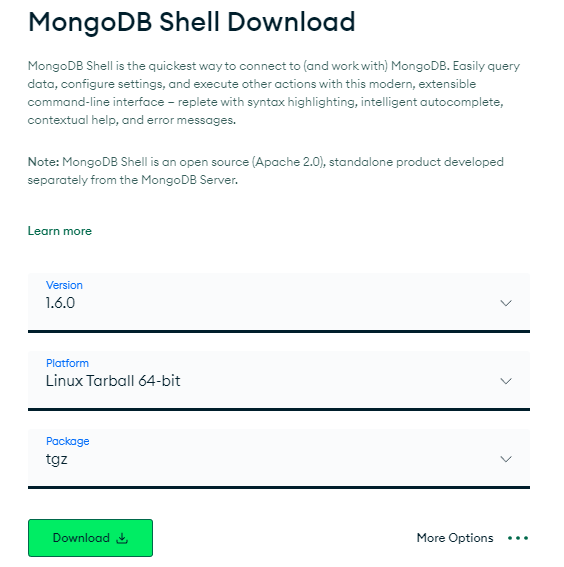
[root@otherserver conf]#wget https://downloads.mongodb.com/compass/mongosh-1.6.0-linux-x64.tgz
4.3.2 解压MongoDB Shell压缩包到/opt
[root@otherserver conf]# pwd
/opt
[root@other-server opt]# tar -zxvf mongosh-1.6.0-linux-x64.tgz
mongosh-1.6.0-linux-x64/
mongosh-1.6.0-linux-x64/LICENSE-crypt-library
mongosh-1.6.0-linux-x64/LICENSE-mongosh
mongosh-1.6.0-linux-x64/README
mongosh-1.6.0-linux-x64/THIRD_PARTY_NOTICES
mongosh-1.6.0-linux-x64/bin/
mongosh-1.6.0-linux-x64/mongosh.1.gz
mongosh-1.6.0-linux-x64/bin/mongosh
mongosh-1.6.0-linux-x64/bin/mongosh_crypt_v1.so
[root@other-server opt]#
[root@other-server opt]# ll
total 57040
drwxr-xr-x. 3 1000 1000      130 Sep 19 15:50 mongosh-1.6.0-linux-x64
-rw-r--r--. 1 root root 58407526 Sep 19 18:36 mongosh-1.6.0-linux-x64.tgz
4.3.3 将mongosh复制到/usr/local/mongodb/bin/目录
[root@other-server opt]# cp mongosh-1.6.0-linux-x64/bin/mongosh /usr/local/mongodb/bin/
[root@other-server opt]# ll /usr/local/mongodb/bin/
total 387944
-rwxr-xr-x. 1 root root     15205 Oct 22 00:13 install_compass
-rwxr-xr-x. 1 root root 140199968 Oct 22 00:13 mongod
-rwxr-xr-x. 1 root root 101846696 Oct 22 00:13 mongos
-rwxr-xr-x. 1 root root 155186384 Oct 22 01:13 mongosh
4.3.4 查看mongosh版本
[root@other-server opt]# mongosh -version
1.6.0
4.4 创建admin用户
db.createUser(
{
    "pwd": "admin@123",
    "roles": [
        {
            "db": "admin",
            "role": "root"
        }
    ],
    "user": "admin"
}
);
4.4.1 mongo命令
[root@otherserver opt]# mongo
MongoDB shell version v4.4.13
connecting to: mongodb://127.0.0.1:27017/?compressors=disabled&gssapiServiceName=mongodb
Implicit session: session { "id" : UUID("df5f7459-46ca-4d52-b616-6c7800bd23de") }
MongoDB server version: 4.4.13
# 查看数据库列表
> show dbs;
admin   0.000GB
config  0.000GB
local   0.000GB
# 切换到admin数据库
> use admin;
switched to db admin
# 创建admin用户
> db.createUser(
... {
...     "pwd": "admin@123",
...     "roles": [
...         {
...             "db": "admin",
...             "role": "root"
...         }
...     ],
...     "user": "admin"
... }
... );
Successfully added user: {
	"roles" : [
		{
			"db" : "admin",
			"role" : "root"
		}
	],
	"user" : "admin"
}
# 查看创建的用户信息
> show users;
{
	"_id" : "admin.admin",
	"userId" : UUID("0ca4f0e3-9963-498c-b528-6b3aab0ac268"),
	"user" : "admin",
	"db" : "admin",
	"roles" : [
		{
			"role" : "root",
			"db" : "admin"
		}
	],
	"mechanisms" : [
		"SCRAM-SHA-1",
		"SCRAM-SHA-256"
	]
}
# 退出登录
> exit
4.4.2 mongosh命令
[root@other-server opt]# mongosh
Current Mongosh Log ID:	63538051a3153c2183528241
Connecting to:		mongodb://127.0.0.1:27017/?directConnection=true&serverSelectionTimeoutMS=2000&appName=mongosh+1.6.0
Using MongoDB:		6.0.2
Using Mongosh:		1.6.0
# 查看数据库列表
test> show dbs;
admin   40.00 KiB
config  60.00 KiB
local   72.00 KiB
# 切换到admin数据库
test> use admin;
switched to db admin
# 查看创建的用户信息
admin> db.createUser(
... {
...     "pwd": "admin@123",
...     "roles": [
...         {
...             "db": "admin",
...             "role": "root"
...         }
...     ],
...     "user": "admin"
... }
... );
{ ok: 1 }
# 查看创建的用户信息
admin> show users;
[
  {
    _id: 'admin.admin',
    userId: new UUID("29a20c49-dfbe-4ca6-a12b-fcb77b0c51da"),
    user: 'admin',
    db: 'admin',
    roles: [ { role: 'root', db: 'admin' } ],
    mechanisms: [ 'SCRAM-SHA-1', 'SCRAM-SHA-256' ]
  }
]
# 退出登录
admin> exit
4.4.3 检查用户是否创建成功
检测用户是否创建成功
[root@other-server opt]# mongosh
Current Mongosh Log ID:	635382891d8eac09ffab28c4
Connecting to:		mongodb://127.0.0.1:27017/?directConnection=true&serverSelectionTimeoutMS=2000&appName=mongosh+1.6.0
Using MongoDB:		6.0.2
Using Mongosh:		1.6.0

For mongosh info see: https://docs.mongodb.com/mongodb-shell/

test> use admin;
switched to db admin
admin> db.auth("admin","admin@123")
{ ok: 1 }
admin> show dbs;
admin   132.00 KiB
config  108.00 KiB
local    72.00 KiB
备注:检查用户创建成功后,需要将MongoBD.conf配置还原。
-d2979772834f4346a961b123d2a49447.jpg)


评论区