


Linux CentOS安装Mysql数据库
1 下载mysql安装包
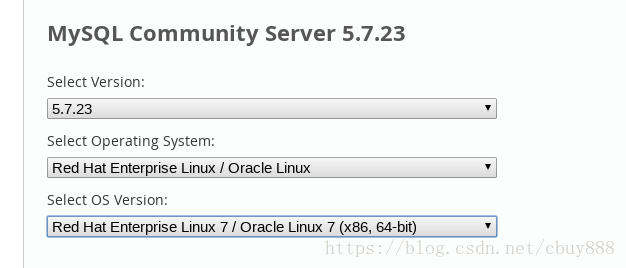
下载安装包:https://dev.mysql.com/downloads/mysql/
wget https://cdn.mysql.com//Downloads/MySQL-5.7/mysql-5.7.28-el7-x86_64.tar
wget https://cdn.mysql.com/archives/mysql-5.7/mysql-5.7.39-el7-x86_64.tar
wget https://dev.mysql.com/get/Downloads/MySQL-8.0/mysql-8.0.31-el7-x86_64.tar

下载好后,解压,我这里把mysql-5.7.23-el7-x86_64.tar 改名成了mysql-5.7.23.tar.gz
[root@git opt]# mv mysql-5.7.23-el7-x86_64.tar mysql-5.7.23.tar.gz
[root@git opt]#
[root@git opt]# tar -xcvf mysql-5.7.23.tar.gz
[root@git opt]# ll
total 697288
drwxr-xr-x. 9 root root        168 Oct 10 21:56 mysql-5.7.23
-rw-r--r--. 1 7161 31415 714022690 Jun 10 23:40 mysql-5.7.23.tar.gz

解压后有两个解压包,只管mysql-5.7.23-el7-x86_64.tar.gz这个包,另一个是测试包不用管
2 开始安装mysql
解压mysql5.7.23.tar.gz安装包
tar -zxvf mysql5.7.23.tar.gz
创建mysql用户和mysql数据保存目录
//创建mysql用户
useradd -s /bin/false -d /usr/local/mysql/ mysql
//创建mysql数据保存目录
mkdir -p /usr/local/mysql
mkdir -p /data/mysql/data
mkdir -p /data/mysql/logs
//分配目录权限
chown -R mysql:mysql /usr/local/mysql
chown -R mysql:mysql /data/mysql
安装依赖
yum -y install libaio gcc make
开始安装Mysql数据
[root@git bin]# pwd
/opt/mysql-5.7.23/mysql-5.7.23-el7-x86_64/bin
[root@git bin]# ./mysqld --user=mysql --basedir=/usr/local/mysql --datadir=/data/mysql/data --initialize
2018-08-03T08:22:14.766220Z 0 [Warning] TIMESTAMP with implicit DEFAULT value is deprecated. Please use --explicit_defaults_for_timestamp server option (see documentation for more details).
2018-08-03T08:22:14.768375Z 0 [ERROR] Can't find error-message file '/usr/local/mysql/share/errmsg.sys'. Check error-message file location and 'lc-messages-dir' configuration directive.
2018-08-03T08:22:15.280059Z 0 [Warning] InnoDB: New log files created, LSN=45790
2018-08-03T08:22:15.372315Z 0 [Warning] InnoDB: Creating foreign key constraint system tables.
2018-08-03T08:22:15.435202Z 0 [Warning] No existing UUID has been found, so we assume that thisis the first time that this server has been started. Generating a new UUID: 543f3d19-96f6-11e8-a609-525400603f3a.
2018-08-03T08:22:15.486161Z 0 [Warning] Gtid table is not ready to be used. Table 'mysql.gtid_executed' cannot be opened.
2018-08-03T08:22:15.486770Z 1 [Note] A temporary password is generated for root@localhost: wM<vlfOyU8kN
//到这里就安装成功了--这个是密码:"wM<vlfOyU8kN"
3 修改my.cnf配置文件
[root@other-server bin]# vim /etc/my.cnf
[root@other-server bin]# cat /etc/my.cnf
[mysqld]
secure_file_priv=/usr/local/mysql
port=3306                     	# 端口
basedir=/usr/local/mysql      	# 数据库安装路径
datadir=/data/mysql/data 		# 数据文件保存路径
socket=/data/mysql/logs/mysql.sock          # socket文件保存位置
character_set_server=utf8       # 数据库编码格式
user=mysql 						# 启动用户
max_connections=1500 			# 最大连接数
skip-grant-tables 				# 免密码登录

# Disabling symbolic-links is recommended to prevent assorted security risks
symbolic-links=0 				# 是否支持符号链接,即数据库或表可以存储在my.cnf中指定datadir之外的分区或目录,为0不开启

[mysqld_safe]
pid-file=/data/mysql/logs/mysql.pid  # PID文件
log-error=/data/mysql/logs/error.log # 错误日志文件

# include all files from the config directory
!includedir /etc/my.cnf.d
4 启动服务
进入到mysql安装包目录将
/bin目录复制到/usr/local/mysql/下
cd /opt/mysql-5.7.23/mysql-5.7.23-el7-x86_64
cp -r bin/ /usr/local/mysql/

测试启动mysql服务
/usr/local/mysql/bin/mysqld --defaults-file=/etc/my.cnf
5 设置Mysql开机启动
5.1 创建mysql脚本
将Mysql安装包目录下的
support-files/mysql.service复制到/etc/init.d/目录下,并重命名为mysqld
cp support-files/mysql.server /etc/init.d/mysqld
5.2 创建/etc/systemd/system/mysql.service使用systemctl命令进行管理
[Unit]
Description=MySQL Server
Documentation=man:mysqld(8)
Documentation=http://dev.mysql.com/doc/refman/en/using-systemd.html
After=network.target

[Install]
WantedBy=multi-user.target

[Service]
User=mysql
Group=mysql
ExecStart=/usr/local/mysql/bin/mysqld --defaults-file=/etc/my.cnf
LimitNOFILE = 5000
#Restart=on-failure
#RestartPreventExitStatus=1
#PrivateTmp=false
解决问题
-bash: mysql: command not found
ln -s /usr/local/mysql/bin/mysql /usr/bin/mysql
解决问题
ERROR 2002 (HY000): Can't connect to local MySQL server through socket '/tmp/mysql.sock' (2)
ln -s /data/mysql/logs/mysql.sock /tmp/mysql.sock
6 修改root用户默认密码
新安装好的MySQL没有修改root默认密码不能执行命令,会一直报错!
mysql> use mysql;
ERROR 1820 (HY000): Unknown error 1820
解决方法:
mysql> SET PASSWORD = PASSWORD('新密码');    # 修改root密码
7 F&Q
7.1 忘记密码并修改密码
- 使用免密码登录,修改密码
1、修改my.conf配置文件
编辑/etc/my.cnf配置文件在[mysqld]的段中加上一句“skip-grant-tables”参数

例如:
[mysqld]
datadir=/var/lib/mysql
socket=/var/lib/mysql/mysql.sock
skip-grant-tables

2.重新启动mysql服务
[root@git bin]# service mysqld restart
Stopping MySQL: [ OK ]
Starting MySQL: [ OK ]

3.登录MySQL并修改MySQL的root密码
[root@nginx-test ~]# mysql -uroot -p
Enter password: # 不需要输入密码直接接入MySQL
Welcome to the MySQL monitor.  Commands end with ; or \g.
Your MySQL connection id is 14159
Server version: 5.7.27 MySQL Community Server (GPL)

Copyright (c) 2000, 2019, Oracle and/or its affiliates. All rights reserved.

Oracle is a registered trademark of Oracle Corporation and/or its
affiliates. Other names may be trademarks of their respective
owners.

Type 'help;' or '\h' for help. Type '\c' to clear the current input statement.

mysql> use mysql;
Database changed
mysql> UPDATE user SET Password = password ('new-password') WHERE User = 'root';
Query OK, 0 rows affected (0.00 sec) Rows matched: 2 Changed: 0 Warnings: 0
mysql> flush privileges;
Query OK, 0 rows affected (0.01 sec)
mysql>quit ;
- 第二种修改密码方法
mysql> use mysql;
mysql> set password for root@localhost = password('123456');
如果报错需要先执行
mysql> flush privileges;
7.2 mysql用户远程链接
mysql>use mysql;
mysql>update user set host = '%' where user= 'root';
mysql>select host, user from user;
7.3 mysql 全目录可执行
ln -s /usr/local/mysql/bin/mysql /usr/bin/mysql
7.4 阿里云远程访问
如果换用户无法访问,检查有无访问链接路径的权限
阿里云需要配置安全组规则,开放3306端口
详见https://blog.csdn.net/wei389083222/article/details/78286629
-d2979772834f4346a961b123d2a49447.jpg)


评论区